BLACK FRIDAY 2022
OUR BIGGEST SALE OF THE YEAR. Up to 80% off all courses and products.
Days
Hours
Minutes
Seconds

Every producer’s dream is to have a clean mix. EQ is often hailed as that golden tool that can unlock the power of any mix.
Of course, it’s more complex than that, but EQ can make a drastic impact on your tracks.
The problem? It’s confusing. It’s complicated. And it’s hard to hear what’s going on half the time.

I get you, I’ve been there myself. But let’s step back a bit and look at the whole picture.
Let’s get into our ultimate ‘how-to’ guide for EQ.
While it might sound obvious to some, it’s important we start from the beginning.
At its core, EQ, short for equalization, lets you change the volume of specific frequencies of a sound.
You can think about equalizers as volume control for different parts of a sound – bass, treble or anywhere in between.
It makes sense, right? We can use EQ to make a dark track sound brighter, give a thin track more body, and a whole lot more.
Most traditional and modern EQs act in this same way, with subtle differences between each variety.
It’s a fundamental tool used in music production, mostly for mixing but also for creative sound design.

It’s not going anywhere soon.
Before we get into the technicalities of EQ, it’s important to consider the different types of EQ.
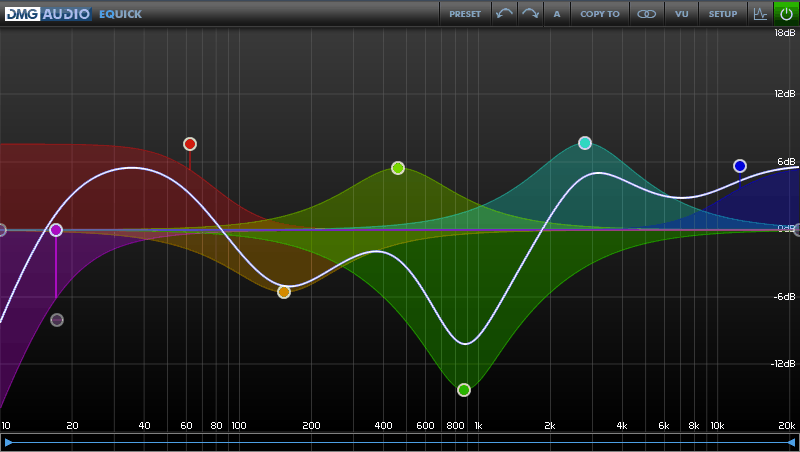
This is the stock standard you’ll find in 90% of DAWs, and is the one pictured above.
Most parametric EQs these days feature a user interface that displays the curves of your boosts and cuts, but older ones tend to feature only knobs.
Parametric EQ is what we’ll be focusing on in this guide.
Graphic EQ is less common but still has its merits. No, it’s not graphic in the sense that it shows you what you’re adjusting on a graph, but it has a slider for a number of fixed frequencies across the spectrum.

While you don’t get as good visual feedback (besides a couple of exceptions), graphic EQs are a great way to learn the frequency spectrum as you can hear exactly what you’re boosting and cutting each time.
There are a lot of misconceptions about EQ that are important to clear up before we start to explain how to use one.
For starters, it’s important to consider that EQ changes the sound in a static way – it applies that boost or cut the same for the whole time the sound plays, without changing.
A boost of 4dB at 5.kHz is always going to boost at 4dB, unless changed manually or with automation.
Many new producers think that EQs adjust to changes in the spectrum differently, but that’s not the case. What you see is what you get.
Also, EQ doesn’t just alter the loudness of frequency content, it also changes the phase of that content.
While this is a more advanced concept (we’ll come back to it later), it’s important to remember that there are implications for EQing sounds other than what you might immediately hear.
Lastly, EQ shouldn’t be a first-resort for mixing, which is unfortunately too often the case with new producers. Simpler yet more effective techniques like volume adjustments, phase adjustments and panning adjustments will often solve issues better than EQ could ever hope to.
Recommended: Mixing EDM
So hopefully you understand what EQ does to a sound. But you might load one up and start losing your mind at all the knobs and curves on the screen.
Don’t fear, firstly I’ll explain the basic EQ controls, then we’ll get into the practicalities of using EQ day-to-day as a music producer.
Let’s start with the different types of controls.
In a standard EQ, you’ll have a given number of bands.
Take Ableton Live’s EQ Eight for example. It has eight bands, all displayed down the bottom.

Each one can be enabled when required, so don’t think you have to suddenly use everything at once. Let’s click on one.
You’ll notice each one has a different curve when you look at it. We’ll get into that in a second.
When you select a band, you’ll see three main controls: Gain, Q (or Width on some EQs) and Frequency (Freq for short). These are three standard controls you’ll find somewhere on 99% of parametric EQs.
Gain is fairly self-explanatory as a volume increase or decrease. Measured in decibels, it tells you how much you are cutting and boosting at a certain point.
Newer EQ plugins and physical units have higher maximum and minimum ranges for gain, allowing for more drastic changes.
Along with gain, frequency is the most important control. It determines the central frequency in Hertz (Hz) you are boosting, cutting or adjusting from. Most modern EQ’s go from ~10Hz up to 20-30kHz, as the range of human hearing tends to be from 20Hz-20kHz.
We’ll cover what different frequencies mean later on in this guide.
Q is a number measured as a ratio between the central frequency and the bandwidth of the curve. In essence, it makes cuts or boosts wide or narrow. Higher numbers mean a more narrow boost, lower numbers mean a wider boost.
You may have heard the advice ‘cut narrow, boost wide’. This makes sense, but it’s highly circumstantial.
Cutting narrow is a more subtle effect for removing harsh resonances from a sound, and boosting wide allows you to avoid creating new harsh resonances, applying a boost to multiple frequencies.
But you may want to work creatively and add a narrow boost to create a resonant bass effect, for example.
The rule here is always second-guessing your habits because they could be doing more damage than good.
It’s worth mentioning that most EQs have an output gain setting, to correct the overall loudness of a sound after processing it with EQ.
This is useful for making sure that any changes you hear aren’t because the sound is just louder.
Each of the above 3 controls is dependant on the curve type selected. The following types are present on most modern parametric EQs.
Bell curves are the most useful and common type of curve on an EQ. They boost or cut a certain central frequency, and the Q determines how much around that central frequency also gets boosted/cut.

Narrow bell curves tend to be for precision tasks, and wider ones are for more general tonal adjustments.
A filter allows you to get rid of unwanted high or low-end information before you dive into balancing the other frequencies.

There are two main types: a low-pass filter and a high-pass filter. The Q in the context of a filter determines how resonant the cutoff frequency is.
Filters come in a variety of types with different slopes, measured in dB/oct. This determines how fast the frequencies get filtered out over the range.
A steep slope sounds very resonant and precise, whereas a gentle slope is more ‘natural’ and subtle.
Basically, this measures how much of a decrease in volume the filter applies over the spectrum. For example, a 12 dB/oct low-pass filter would reduce high-frequency content by 12 dB at every octave interval.
Naturally, the higher the dB/oct, the more sudden the slope. The above high-pass filter is a 12dB/oct, and the low-pass is a 48dB/oct. If your EQ allows you to customise this more, play around and see how different slopes affect the sound.
Low and high shelves are also common EQ curve types. They allow you to boost or cut all frequencies below or above a certain point, respectively.

The Q determines how sudden or gradual the shelf comes in. A low number is much wider, whereas a smaller number is much more sudden and steep.
Shelves can be great for general tonal balances – think of the bass and treble knobs on your parents old stereo player.
Note: EQs that only have shelves are called Shelving EQs.
Perhaps the least common, a notch/bandpass filter will either cancel out a specific range of frequencies or only pass through a specific range.
For example, you can see EQ Eight is performing a notch at around 1.4kHz.

Ableton Live’s EQ Eight doesn’t have a bandpass filter, but you can emulate one by simultaneously using low-pass and a high-pass filter.

Want to learn more about filters? Check out our dedicated article here.
These are approximate ranges for each of the main ‘areas’ you’ll find in a mix. The frequency ranges are approximate, as there could be overlap in certain tracks.

Most modern EQs have analyzers built-in so you can observe what frequencies are in a sound. Many of them have a pre and post EQ setting as well, so you can observe the result of the EQ being applied as well as before.
Note that the ranges get visually smaller at the frequencies increase on the graphic above.
This is because EQs show frequencies on a logarithmic scale, which in English, just means that that higher frequencies are heard closer together. Don’t worry too much about it.
Here are the main ranges:
Common descriptive terms: Rumble, Thump, Vibrations
Instruments/Sounds: Sub, Kick, Sub Impact, Noise Rumble
Sub-bass, or sometimes just called ‘sub’, is an important frequency range in electronic and dance music. This is only reproduced with a subwoofer, so it’s important that it is present and mixed well. Most of this range is felt rather than heard and gives a track movement when heard on a big system.
Too little and your track will lack club-ready cohesion. Too much and your track’s headroom and space will get eaten up.
Common descriptive terms: Boom, Punch, Body, Weight
Instruments/Sounds: Bass Synth, Bass Guitar, Kick Body, Snare Body
This is the main range of bass that most people refer to when talking about bass. Most bass synths and kick drum bodies sit around here.
These frequencies tend to layer nicely with sub-bass frequencies, so it’s important that there is a delicate balance between the two.
Common descriptive terms: Warmth, Fullness, Mud
Instruments/Sounds: Chord Synths, Pads, Leads, Keys, Vocals
Low mids are a very crucial part of the mix. The lower end of the melodic spectrum tends to sit around here, include the fundamental frequency of vocals.
Too much and it can make a mix muddy, too little and you can lose the warmth of a mix. Sometimes producers tend to high-pass too much of this frequency range out.
Common descriptive terms: Honk, Musicality, Drone, Knock
Instruments/Sounds: Leads, Strings, Vocals, Pads, Other Synths, FX
Also a very important part of the mix, as most of the higher-end melodic content of your track sits around here. It’s important to keep this clear in the mix otherwise you could end up with quite an empty sounding mix.
Common descriptive terms: Tinny, Presence, Crunch, Edge, Sibilance, Clarity
Instruments/Sounds: Cymbals, FX, Synth Texture
High mids contain a lot of the character in sounds, such as the ‘sss’ of a vocal or the crunch of a synth. Around 2-4kHz tends to be the most sensitive frequency to human ears, so it’s important to check if a mix is too ‘in your face’.
Common descriptive terms: Air, Brightness, Thin, Definition, Sparkle
Instruments/Sounds: Cymbals, FX, Noise
These frequencies are the very top end of the spectrum. Here you’ll get the sizzle and definition from sounds.
Recommended: Mixing For Producers
We’ve spent the last two sections talking about the controls of an EQ, and the content of a frequency spectrum.
Now we marry these concepts together by showing you how to use EQ as a tool to solve problems in the frequency spectrum.
Subtractive EQing involves cutting frequencies from a sound.
Subtractive EQ is a producer’s most common technique for solving mix problems, but too often it ends up being additive EQ instead.
Often by listening to a sound, we can identify the parts we want to hear more, but it’s more difficult to identify the parts we don’t want to hear.
The issue is, producers resort to boosting instead. This isn’t always bad, but it can create gain staging issues much later down the track, because with boosting, a sound gets louder, making it more likely to clip.
It’s also important to consider that cutting more narrow achieves a more subtle effect, whereas wide cuts can be quite noticeable.
Here are a few chords:
They sound okay, but they’re a little muddy in the low mids. To make them sound a little cleaner, I’ll cut 2.5dB in the range of 170Hz. We’ll use a wide Q of 0.71 so it cleans up adjacent frequencies too, and because we aren’t taking too much out that a wide cut would be too noticeable.

Here’s the result.
As previously mentioned, additive EQ is when you boost a sound to get it to a desired sonic state.
Additive EQ can be powerful when done correctly. For example, it’s easier to turn to additive EQ once subtractive EQ has been applied or at least considered.
It can be easier to boost just the highs instead of cutting 5 other frequencies just to achieve the same result.
I have a Congo drum sample that isn’t quite bringing out the drum hits very well. I could cut some of the lows out and bring up the overall volume, but it’s sounding fairly balanced down there already.
So I’ll give it a boost at 7kHz of about 3.5dB to bring out that character.

Here’s the result:
Creative EQing tends to be useful for sound design, but it can be useful for mixing too.
There’s no real correct way to approach creative EQing, but it involves experimentation and trying new things.
For example, you might pull up some EQ presets to see how they change a sound. You might end up picking one that perfectly suits what you were trying to achieve.
You could also just go nuts by tweaking random parameters to color the sound in different ways.
I have an experimental glitch chord sample that I want to layer in my mix.
It sounds really cool, but the frequencies are a bit dull and flat. I want to do something to spice up the sound.

I loaded up an EQ Eight in Ableton Live and chose a few presets, eventually settling on the ‘Acoustic Git EQ 2’ one, as it gave some nice character to the high end.
Balancing EQ involves analyzing multiple sounds to see how they interact, and then using a combination of other techniques to get them to sit together.
For example, vocals and chords might clash in the mix. The vocal is louder, but some notes get buried under certain chords.
In this case, you could apply subtractive EQ to the chords and additive EQ to the vocal in the same ranges. You change each sound subtly, but it helps the other to stand out more.
Here I have the chords from the original Subtractive EQ example layered with a vocal sample.
The vocal is louder than the chords but the fundamental still seems to get a bit buried.
Now I could turn the sound up more, but it would stick out too much then.
So I can turn down the chords at about 450Hz:

And turn the vocal up in the same range:

To get the following result. Notice how the vocal pokes through a bit more now.
Recommended: 50 Mixdown Tips
EQs have become quite advances thanks to technology advancements, so you’ll find a few more knobs and dials that might have you asking what they’re for.
Mid/Side EQing allows you to process the mono and stereo information separately, giving you greater control over the mix.

This is particularly useful on groups or busses, and even the master, where you might want to make overall changes to the stereo image.
Left/Right EQing achieves the same result as M/S EQing, except that the left and right channels are split instead of the mid and side ones.
This is very useful for balancing out stereo tracks that might have been recorded differently, or for adding subtle stereo interest to a sound.
We referred to dynamic EQ earlier in the article, but as the name suggests Dynamic EQ reacts to changes in the frequency spectrum.

A great application of this would be that maybe you want to cut out more of a sound when it gets louder in the drop, but not as much when it’s quieter in the breakdown.
Most EQs that come with your DAW likely won’t be dynamic, so you’ll have to find a third-party solution if you want this functionality.
Oversampling refers to how high an EQ listens to the frequency range beyond the standard sample rate.
For example, a sound may have frequency information beyond 20kHz that may impact how the sound is perceived in the audible range.
Don’t worry too much about the technicalities if you’re a beginner – just know that it uses more CPU so you’ll likely want to enable it later in the mixing/mastering stage if performance is a problem for you.
Recommended: Oversampling
As we mentioned far earlier, an EQ doesn’t just change the frequencies, but also the phase.
The phase refers to the position of those frequencies over time in relation to the rest of the signal.
Normally this isn’t a problem and isn’t audible, but it can be, especially in the low-end.
This is where linear-phase EQs come in. They keep everything relatively in phase, at the cost of more latency.

Linear Phase EQ can be useful when EQing a kick drum, bass, a drums buss or even the master channel because you might drastically change the phase, which could ruin your mix.
If you’re a beginner, don’t worry about this. 99% of the time you won’t run into this issue. But it’s good to know that there is a tool out there that can fix this.
Like Dynamic EQs, Linear Phase EQs aren’t likely to come shipped with your DAW, so you may have to go looking for one to buy.
Recommended: What the f*ck is Linear Phase EQ?
Modern parametric EQs allow you to match an EQ curve to a particular sound using advanced algorithms.

This is useful if you want to achieve the tone of a certain sound or track but are unsure of the process or want to speed it up.
Certain third-party plugins like FabFilter Pro-Q 3 and iZotope Ozone have these features built-in.
There is never a ‘best EQ setting’ for any sound, and unless you are experimenting, doing arbitrary movements or using a preset every time for different sounds isn’t going to work out.
Here’s our 3 step ICE method, which stands for Identify, Choose & Experiment.
Truth be told, most new producers skip this stage when using EQ. But if you don’t know what you’re fixing in the first place, the best EQ you should apply is none at all.
Start by listening to the sound in the context of the mix. What’s happening? Is it too loud or quiet? Is it inconsistent? Is it too dull?
Once you’ve identified the problem, it’s time to choose an approach.
Before reaching for your favourite EQ, first, consider whether it’s the best tool for the job.
Perhaps simply changing the volume could fix the issue (it does in many cases).
If EQ is the right choice, maybe you’ll have to choose the type of EQ you want. Just a standard parametric EQ? Or maybe a linear phase EQ?
Lastly, choose what curve types and techniques you’ll want to use. Maybe you need a low-pass to get rid of the low-end rumble, or a bell curve to tame the mids.
If EQ is your tool of choice, try the different techniques to see what sounds best.
Perhaps a cut in the lows and gain compensation would help the pads to sit better in the mix, or maybe try a low shelf so it doesn’t get rid of the warmth altogether.
Maybe try some creative EQing to help a sound fit in the mix better.
Try a few solutions and see which one ends up working the best.
Repeat this process every time you reach for an EQ, and using the information you’ve learned from this guide, and you’ll improve your EQing skills in no time.
I get it – you’re not going to finish reading this guide and become a master of EQ. You’ll need to put in the hard yards to become adept at the skill.
But, what if there was something to speed up the process?
That’s why we created our EQ Cheat Sheet, so you can get all the info from this guide on one page.
