


Chorus, flangers, and phasers… You’ve surely seen these effects in your DAW before, but can you tell what they do?
They’re much less common than, say, reverb of delay – but they’re powerful effects for sound design.
And they all work in a similar way, but with subtle differences.
So let’s explore what sets these 3 effects apart, and how you can integrate them into your music!
We’ll go over their basic settings, some practical applications, and a few third-party plugin options.
Let’s take a look! 👇
Table of contents
Why Group These Effects Together? 🤔
So why are we talking about chorus, flangers, and phasers in the same guide? Well, in effect (no pun intended), they work in very similar ways.
Chorus, flanging, and phasing are all time-based effects – they are created by a combination of subtle delay, pitch-shifting, and filtering.
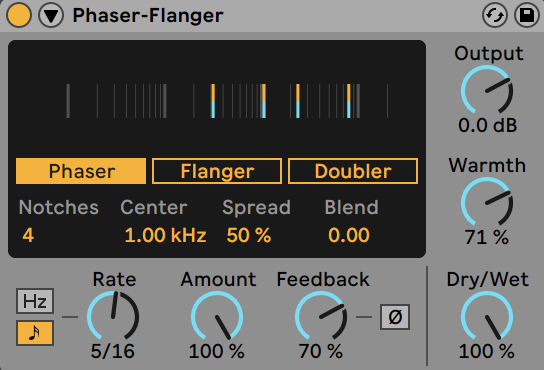
This is why they often combine the same settings, and their layout looks very similar:
The desired end result will determine which of the 3 effects you’ll want to use. So in the next few sections, we’ll dive into the inner workings of each of them.
Chorus: The Quickest Way to Thicken Your Sound
Chances are you’ve heard of the word ‘chorus’ before. The picture that comes to mind to most people is that of a choir:
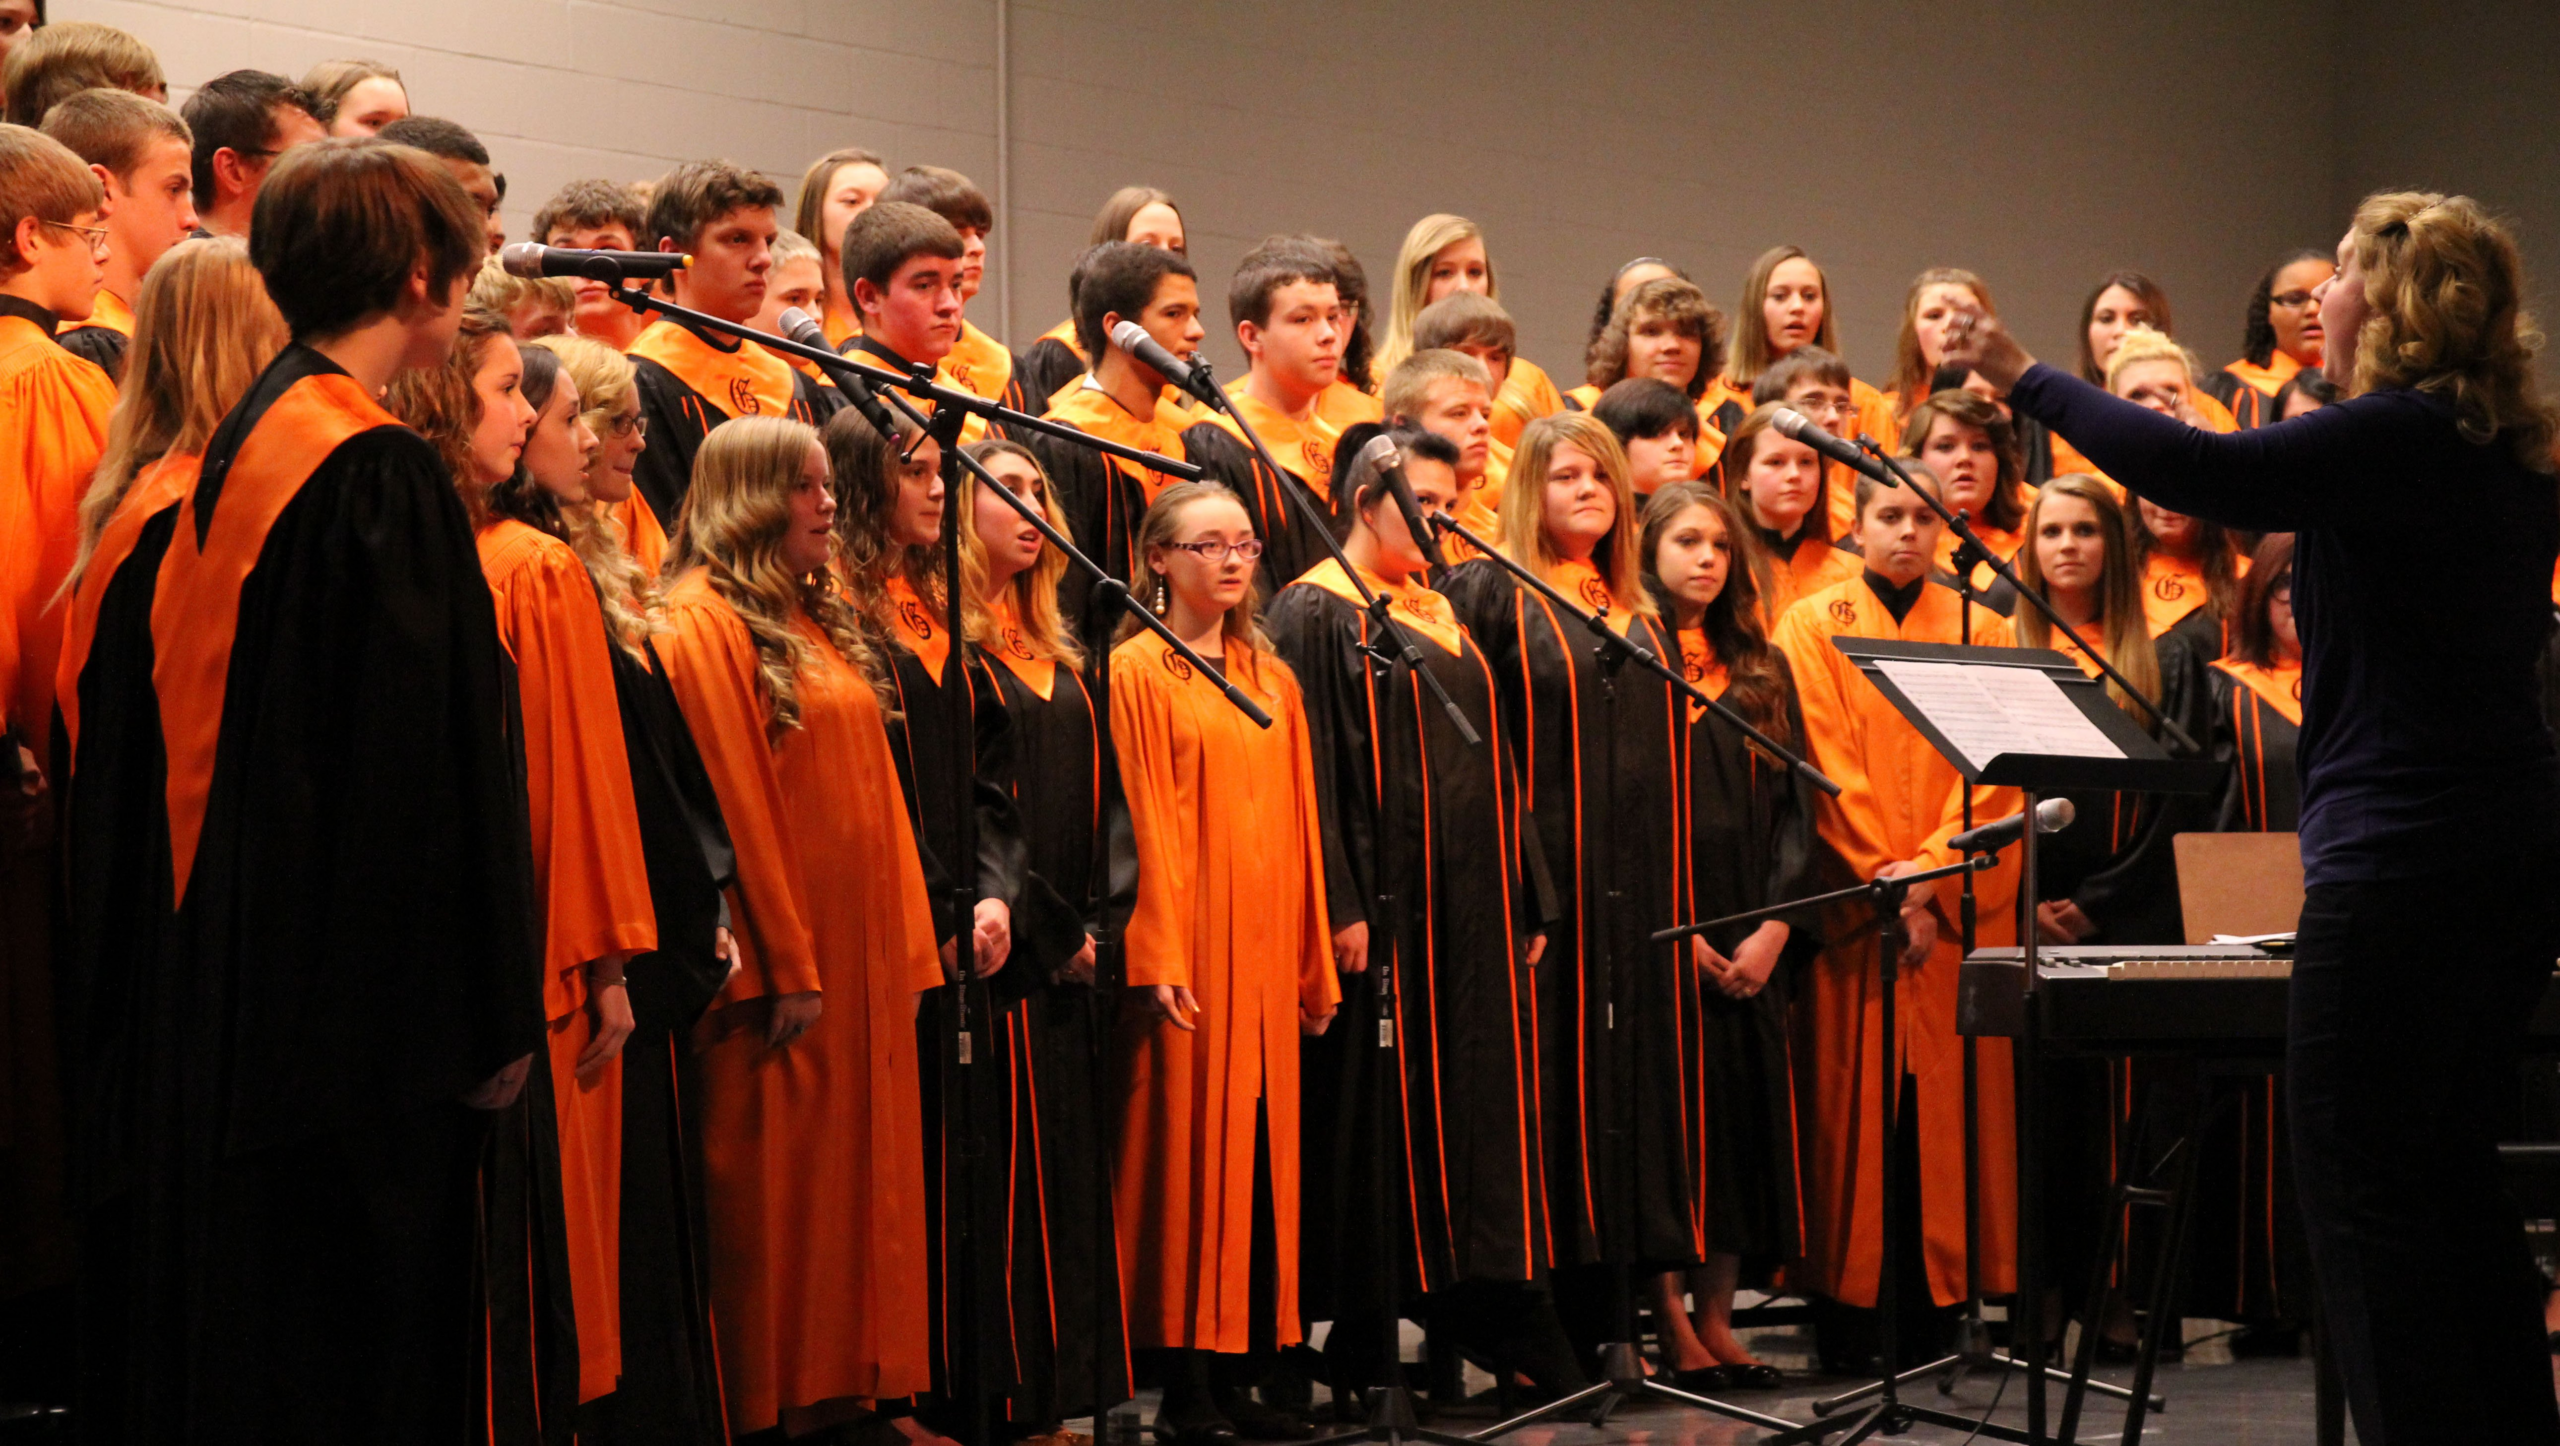
A choir is a perfect place to explain the chorus effect, and there’s a reason a choir is also known as a chorus 😉
In a choir, you have different sections of singers singing together. Each section is supposed to sing the exact same thing, at the same time.
However, 100% accurate timing and pitch are impossible. Singers will always sing with minuscule variations in time and pitch.
This is what creates a chorus effect. Because the variations are so subtle, the multiple sounds are perceived as one. Here’s a quick example:
Although 3 pianos are playing in this example, you still perceive them as one.
As a matter of fact, when I think of chorus, I think of the intro to Metallica’s “One”. Maybe not the best example to pick for an electronic music guide, but bear with me:
Metallica was famous for using the chorus effect on their clean guitars. Here’s an example of a guitar loop where I simply added a basic chorus effect:
You can hear how the chorus adds character and tone to the sound.
But how does the actual effect work?
How to Tweak Parameters in a Chorus
The most common settings you will find in a chorus plugin are:
- Delay: sets the amount of time separating the original sound and its copies;
- Depth: how much the delay time will vary
- Rate: sets how fast to vary the delay time
- LFO frequency: sets the frequency modulation of the copied voices
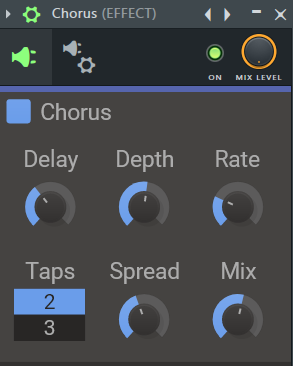
In this screenshot, the delay is set at 3.14 ms and the depth at 10.3 ms. This means the copied signal will move between 3.14 ms and 13.44 ms (3.14 + 10.3) from the original sound.
How fast it sweeps between these delay times is set by the rate. In this case, it is set at 0.26 Hz.
Pushing the rate between 5 and 10 Hz will start creating a wobbling effect:
For a deep, clean chorus effect, select a relatively low delay and depth time:
Chorus also works really well on classic, 80s-style synth sounds:
Finally, you can also try adding a chorus on vocals. However, be careful if using them on main vocal leads:
When working with elements such as vocals or lead synths, a good rule of thumb is to work in parallel.
In terms of plugin options, your stock plugin will usually get the job done. However, if you’re looking for a more professional solution that gives you more control, check out this great article.
Flanger: Create Retro-Sweeping Effects
Flanger is the name given to the effect unit producing the flanging effect.
Flanging occurs when two identical signals are mixed together, where one is delayed by a small and gradually changing period.
We can see that, except for the frequency modulation, the process is similar to a chorus.
The result is a sweeping, comb-filter type of sound:
How to Parameter a Flanger
Two settings set a flanger apart:
- Feedback: feeds the processed signal back into the flanger
- Phase: allows inverting the phase of the fed-back signal to create more variation
Furthermore, what sets a chorus and a flanger apart are the delay and depth settings.
A chorus uses short delay times to create the illusion of a single sound. A flanger combines high delay and depth times with a slow rate to create a sweeping effect.
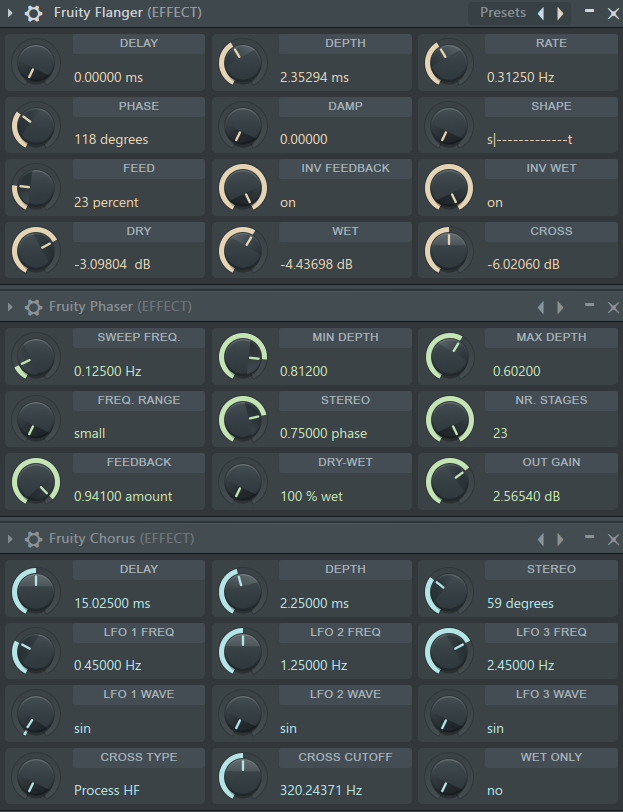
To create the classic flanging sound in FL Studio, use the following settings with Fruity Flanger:
- delay: 0 ms
- depth: 1.5 ms
- rate: anything below 0.5 Hz
This is the sweeping sound you will get:
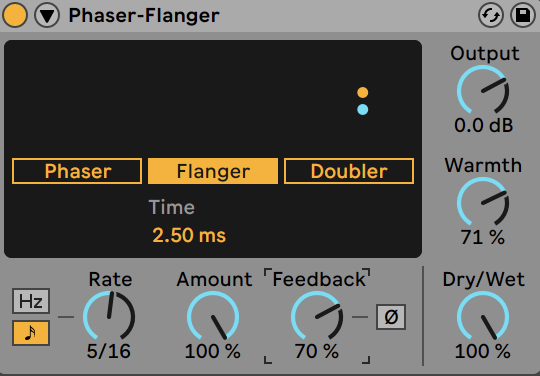
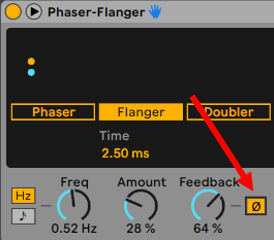
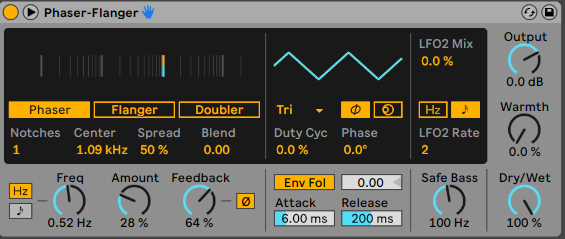
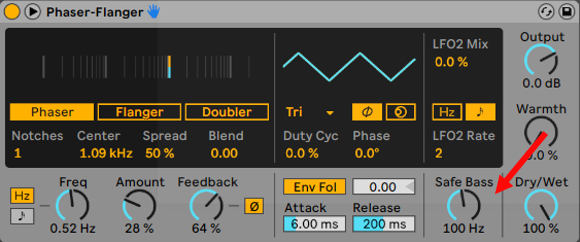
In Ableton Live, you can use the stock plugin Phaser-Flanger with the following settings:
- Freq: 0.43 Hz
- Amount: 28%
- Feedback: 16%
By pushing the feedback, you will get more pronounced flanging:
Inverting the polarity of the fed-back signal can also create drastically different results:
If you want to create weird artifacts, you can push the delay time close to 20 ms. I like to record the audio as I play with the settings, and then sample the pieces I like:
When adjusting the feedback level, make sure to set a limiter at the end of your effects chain!
When to Use a Flanger?
Flangers can sound quite gimmicky if used too prominently. I find that they work best when used in the background, say with pads for example:
Adding a flanger on electric guitars was popular in the 60s and 70s. Using it today can evoke a nostalgic feeling:
Phaser: Generate the “Synthesizer” Effect
Finally, let’s look at the phasing effect. Phasing is a concept very similar to flanging, which is why a lot of people confuse them.
They are both time-delay effects. This means that a phaser also works with a delayed copy of the original signal. But the way the delay works is different.
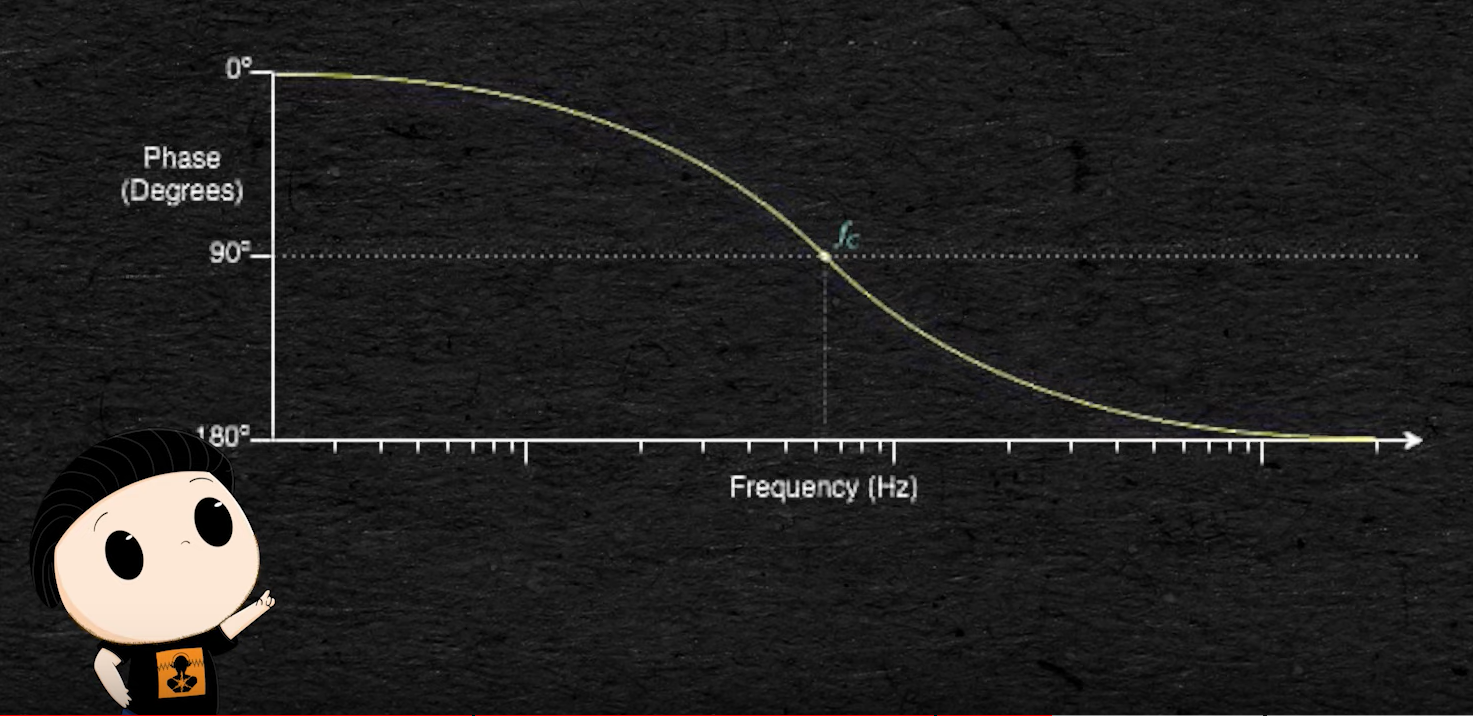
In a phaser, the copied signal goes through one or multiple all-pass filters. These filters shift the phase of the signal in a non-linear way, meaning low and high frequencies are shifted by different amounts.
If you need a refresher on all things “phase” and “phase cancellation”, check out our latest guide!
Don’t worry if this is all a bit technical. The best way is to simply use your ears and see what you like!
In this example I’ve used white noise so that the entire frequency spectrum is represented:
To my ears, a flanger has a more “washy” sound, while a phaser sounds more “focused”.
How to Parameter a Phaser
Because the process is similar to a flanger, many of the settings are similar. However, a few key settings are different:
- Center (in Ableton Live) or Min and Max Depth (FL Studio): sets the center frequency around which the phaser will act
- Notches or Stages: sets the number of notches created in the frequency spectrum. The more notches you set, the harsher the sound.
Here is a comparison of how the number of notches affects the sound:
The more notches you add, the more “robotic” the sound.
The Best Plugin Choices (Free and Paid)
Before I leave you, let’s go over some of the best plugins to play with chorus, flanging, and phasing.
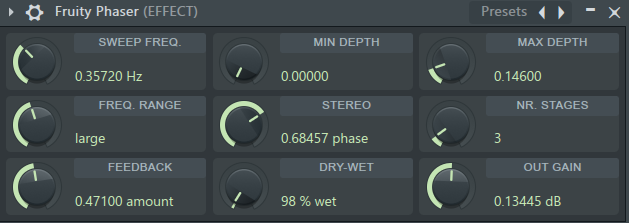
Fruity Chorus, Fruity Flanger, and Fruity Phaser (Free)
Because I don’t tend to use these effects that often, I find that FL Studio’s stock plugins do a great job.
And to be fair, they have pretty much all the parameters you need to create amazing results:
One thing they do lack is some kind of visual representation. But sometimes it’s better to just trust your ears!
Ableton Live’s Chorus-Ensemble and Phaser-Flanger (Free)
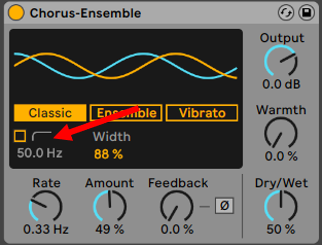
Ableton provides 2 different plugins that cover all 3 effects: the Chorus-Ensemble and the Phaser-Flanger:
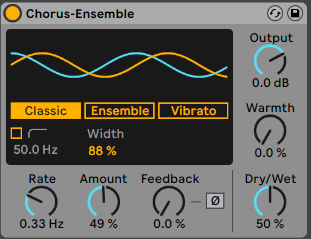
Chorus-Ensemble has 3 modes: Classic, Ensemble, and Vibrato. Choose the “Ensemble” mode if you want a rich and smooth sound, or the “Vibrato” mode for harsher pitch modulation.
One cool feature to mention is that both plugins have a “high-pass” safety mode. This reduces the effect on the lower frequencies:
UVI Thorus (Paid)
Probably my favorite chorus plugin in terms of interface, the UVI Thorus is an 8-voice chorus plugin:
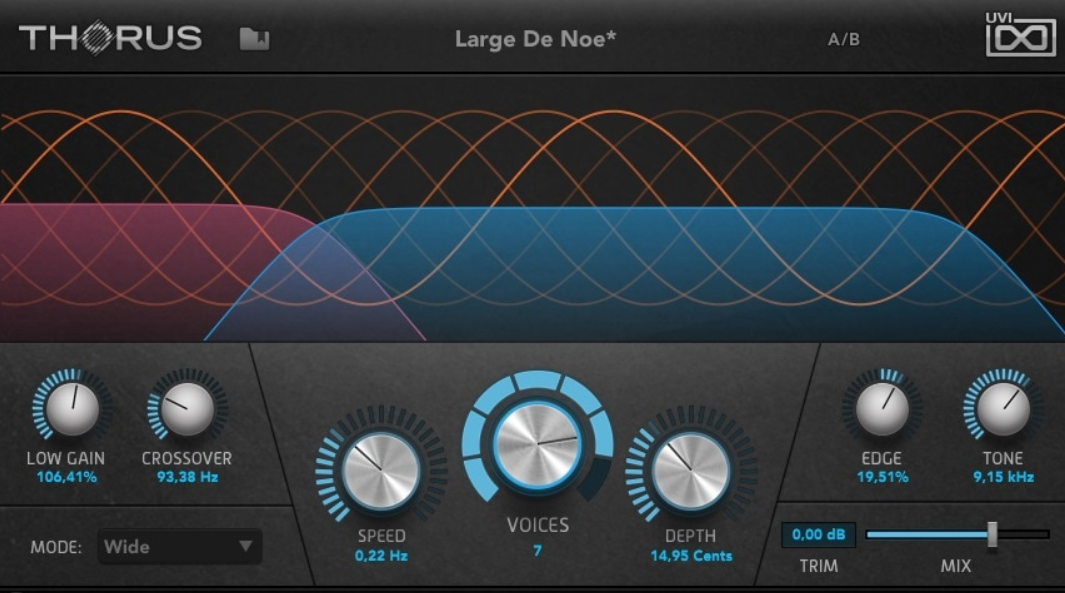
It features all the classic parameters you would expect, plus a cool A/B button to compare between different choruses.
Arturia Flanger BL-20 (Paid)
If you’re looking for the closest thing to an analog effect unit without breaking the bank, look no further:
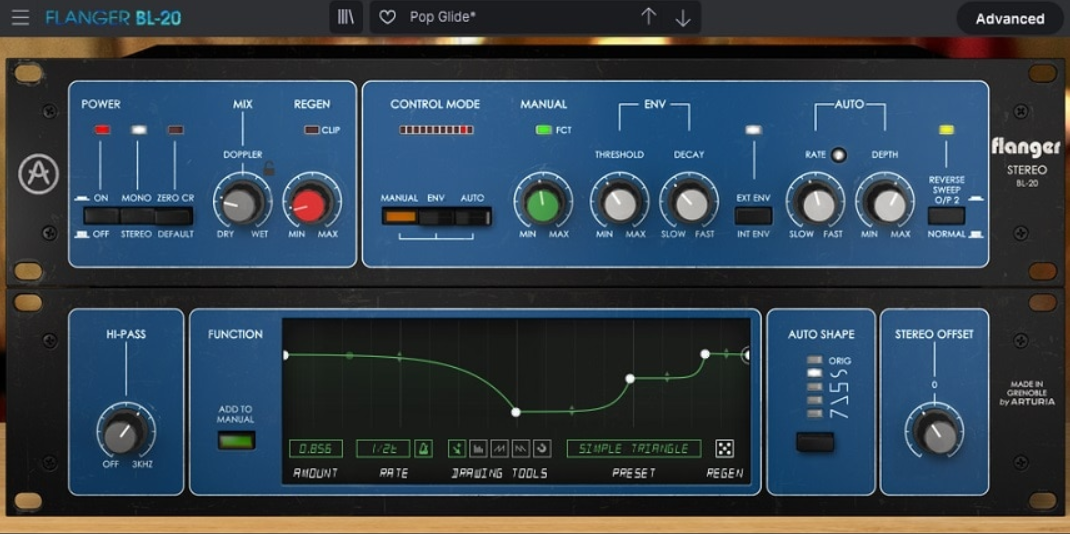
The BL-20 is a recreation of the BEL BF-20 stereo flanger. It offers a wealth of customizable parameters, such as a stereo enhancer, LFO modulation, and 28 different presets.
Last Words
That’s it for this guide! I hope you now have a better understanding of all things chorus, flanger and phaser! I hope you found it useful and were inspired to create some amazing sounds! Did I miss out on anything? Let me know at [email protected].
