


Reverb is one of the first effects producers learn to use.
And why wouldn’t they? Reverb instantly adds depth and emotion to any sound.
But if you’re not careful, you can fall into the trap of “just adding reverb” – which is the quickest way to destroy your mix. So it pays to understand it well.
In this guide, we’ll cover the basics of reverb. We’ll look at the most common parameters, tips on how to use reverb, and some of the best plugin options you can use today.
Let’s go! 👇
Table of contents

What is Reverb? 🤔
Before talking about reverb effects, let’s talk about reverberation.
Reverberation is what you get when a sound persists after the original sound has been produced.
Imagine this:
You’re standing in an empty church and you shout out your name. You probably shouldn’t, but let’s imagine for illustrative purposes.
As soon as you finish pronouncing your name, the church will still be filled with the sound you produced. That’s reverberation.
Or picture yourself in a tunnel, you shout out “Hello!” and you hear the echo back at you. That’s also reverberation.

This happens because the sound is being reflected off multiple surfaces. Those reflections build up and reach your ears after the initial sound was emitted.
This is what creates a sense of space and volume. And a reverb effect in your DAW replicates this physical phenomenon of reverberation.
Rooms, Halls, and Plates… What’s the Difference?
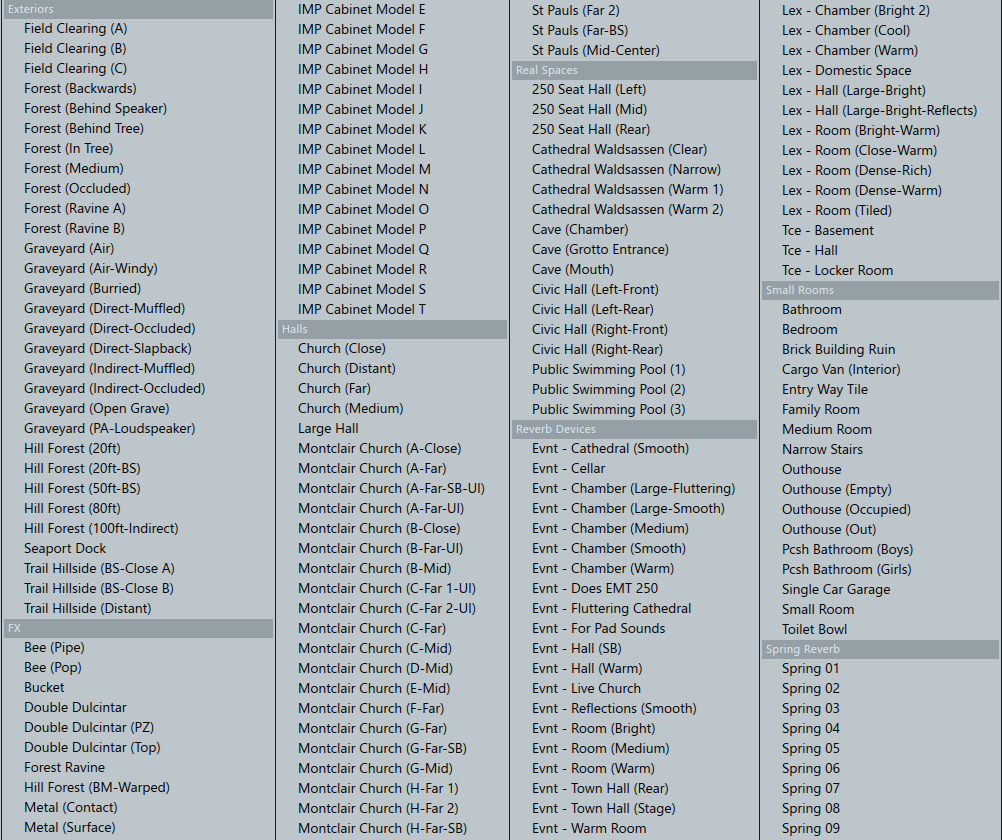
If you’ve used any reverb plugin in the past, you will have come across terms like plate, spring, or hall.
These terms refer to different types of hardware reverb units that were created over time. Let’s go over some of the most popular ones:
Room reverb
Room reverb is the most basic type of reverb, and will emulate the sound of a small room.
The goal of this type of reverb is to recreate the natural reverb you hear when talking or playing an instrument. Common room types might include bedrooms, living rooms, and or even bathrooms.
The decay time (more on that later) is quite short, making it almost barely noticeable.
Chamber reverb
A chamber reverb refers to studios that had a dedicated room for recording reverb.
These rooms were padded with reflective materials, and equipped with a microphone and speaker to record the reverberation.
They typically provide a reverb that is lush and full of distinct characteristics but with more clarity than a room or hall reverb.
Hall reverb
Hall reverbs are a producer favorite. They aim to emulate concert halls, i.e. long and spacious reverberations.
They will typically last for several seconds. This is why you need to be careful when using them as they can quickly muddy your mix.
Plate reverb
All the reverb types discussed previously are modeled off actual physical spaces. But there are other types of reverbs that don’t follow the same logic.
Plate reverbs were invented in the 50s and consist of a vibrating metal sheet toward which sound is emitted. These sheets can vary in size, from a few centimeters high to several square meters.

This type of reverb is often described as dark, warm, and dense. It is one of the most unique and characteristic reverb sounds:
Spring reverb
Similar to plates, spring reverbs are a mechanical creation to create reverberation. Their mechanism is similar to a plate reverb, but metal springs are used instead of metal sheets:

They have a shorter decay time than plates, and have a characteristic metallic sound to them. They provided a vintage style of sound, and are especially popular on guitars.
Convolution reverb
Finally, let’s talk about convolution reverb.
Convolution reverbs are not a specific type of reverb, but a way of re-creating any type of reverb.
By using impulse responses, reverberations through physical spaces are recorded. They are then re-created digitally and can be applied to any sound.
Here’s why this is so powerful:
It allows you to capture the sonic characteristics of say, your own bathroom, and then apply that reverberation to any sound you want.
Crazy, right?
The Most Important Parameters of a Reverb
Before diving into practical examples, let’s go over the most common settings you will find on any reverb plugin.
For each of these, I’ll make the habit of adjusting it in the context of the full mix. A huge decay time might sound great in isolation, but completely drown other instruments!
Decay
The most straightforward setting on a reverb plugin is the decay time.
It is the length of the reverb “tail”, or how long it takes for the reverb to die out. It is possibly the most crucial part, and the easiest to get wrong.
Less is more with decay, so start small and increase gradually.
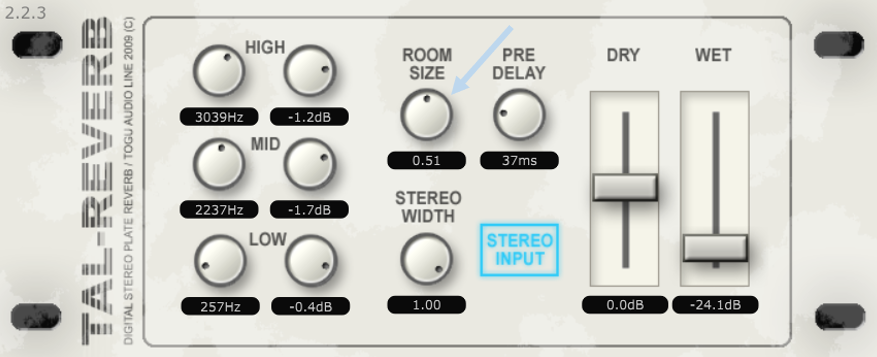
Size
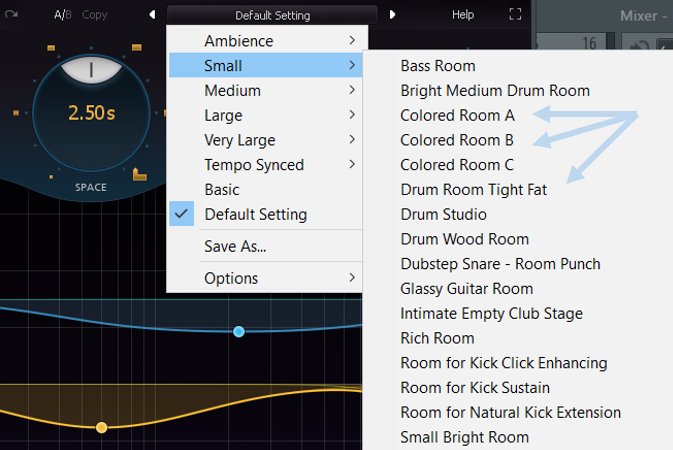
Also called “Room size” or “Space”, this defines the size (duh) of the space in which your sound has reverberated.
Select a small size for a bedroom-style reverb, or increase it to crazy levels to mimic a cathedral.
In the real world, Decay and Room Size usually go hand in hand and are adjusted in tandem. For example, the bigger the space, the longer the decay will be.
If you are going for a natural-sounding reverb, avoid increasing the Decay too much while keeping the Size low.
In the following example, I’ve used a 5s Decay time (which is very long), but a very small Size:
You can hear an unnatural and unpleasant ringing. However, keeping the long decay time but increasing the size gives a more natural sound:
Delay
Also called “Pre-delay”, this setting introduces a short pause between the initial sound and the reverb. Delay introduces some separation between the source and the effect:
Mix (Dry / Wet)
Finally, as with most plugins, a Mix or Dry / Wet knob allows controlling the amount of effect applied.
0% will leave your signal dry of any reverb, while 100% will only leave the effect and remove the dry signal.
When processing through a send channel (more on that later), you should always set your Mix to 100%.
4 Ways to Use Reverb Effects
Now that the basics are covered, let’s get into different ways you can use reverb creatively:
1. Enhance Vocals
Processing vocals is possibly the most common use of reverb.
As mentioned previously, natural reverberation is present in any room you record in. This is why vocal recordings will take place in dedicated vocal booths or with isolation shields:

This provides a “dry” recording so that the desired reverb can be applied afterward.
The type of reverb you choose will depend on your style. Orchestral, dramatic takes might call for a huge hall reverb, while a more intimate folk track might need a small room reverb.
In any case, introducing a bit of delay will create some separation with the main vocal and create clarity.
Here’s an example:
If you are working with the main vocal line, it might also be a good idea to work in parallel. Essentially, you create a copy of your dry signal where you apply 100% effect to it:
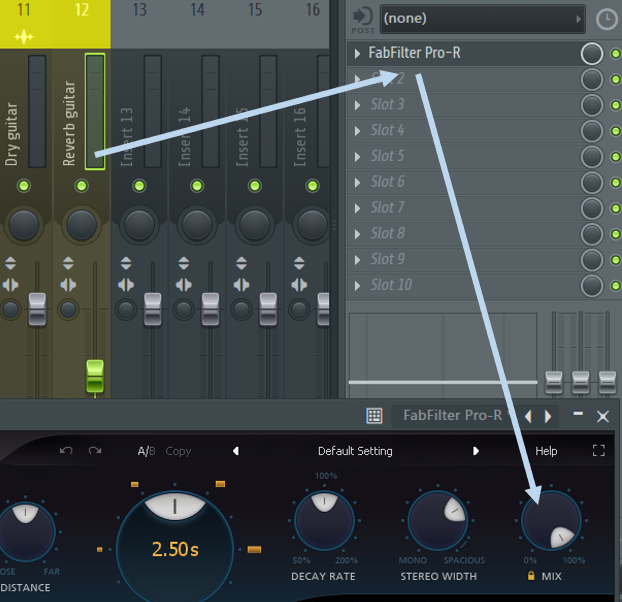
This lets you blend in just the right amount of reverb that you want. Furthermore, you can then sidechain the reverb so that it peaks and ducks behind your dry vocal, creating clarity in your mix:
You can hear how the second version is a lot cleaner and leaves room for the main vocal to breathe.
If you need a refresher on all things Sidechain Compression, make sure to check out our latest article!
2. Make your drums more organic
Common feedback you might receive on your early tracks is that your drums are “a bit dry bro”. This was definitely my case when I started out, and a great way to solve this is with reverb.
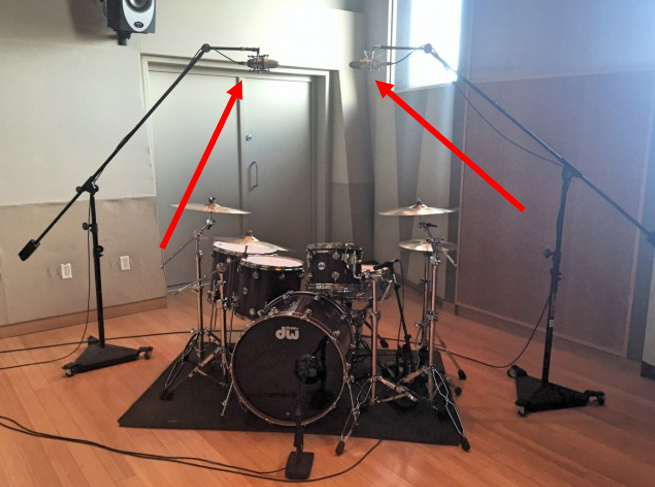
The goal here is to replicate the room mics that are generally used in live drums recordings:
Now, you could simply add reverb on your main drum bus, but that can easily become messy and washed out.
A better way is to use a parallel channel:
First, set up your parallel channel and add a reverb unit with a 100% wet signal. Make sure the decay is short.
Next, use an EQ plugin such as Pro-Q 3 to remove the mid information. This will leave a reverb with only the side signal:
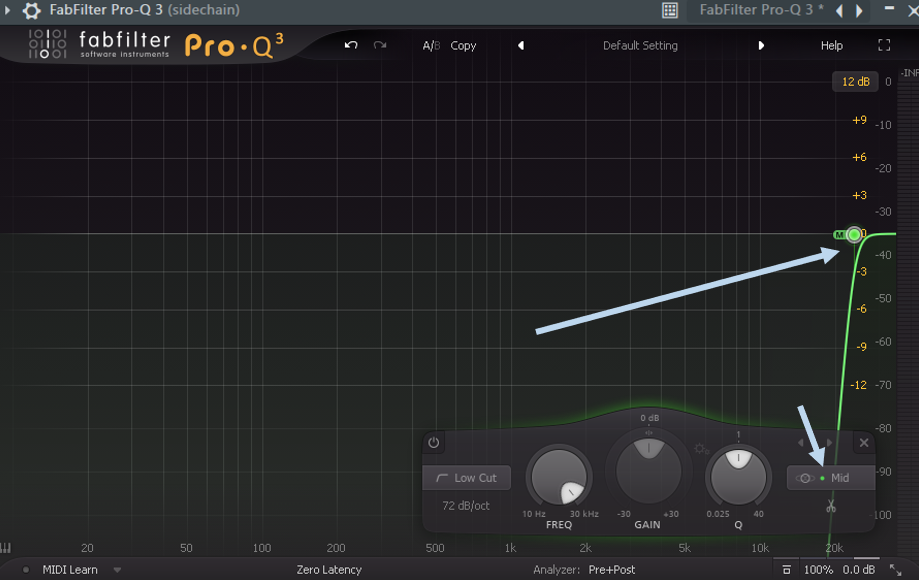
At this stage, you can add your favorite stereo shaper plugin to add some width to the reverb. Finally, low-cut everything below roughly 200Hz and blend to taste with the dry signal.
3. Create in-context atmospheres
One issue you might run into when writing tracks is that the elements feel disjointed.
Your pads, piano, arps, and vocals might sound great in isolation, but somehow they don’t gel together.
One trick you can use to add cohesion to your tunes is to create pads and atmospheres based on other elements in your tracks. For example, creating an atmosphere based on the vocal you use.
Let’s check this out with an example. I am starting here with a basic loop including drums, bass, and vocals:
I would like to add some kind of underlying atmosphere. Instead of adding a brand new sound, I am going to use the vocal to create a pad.
In a separate channel, I put a copy of the vocal and add some huge reverb to it. This is a good place to experiment with extra-long decays, sizes etc.
Now, I am going to use the long tail of that vocal reverb to create a pad.
Next, I add a bit of compression to even out the volume and remove some of the low. Throw in some sidechain and this is what I ended up with:
I can now blend in this pad with my main vocal, and I am sure it will fit in nicely:
This can work with any melodic element you have: vocals, piano, synth lines, etc.
4. Introduce new elements with reversed reverbs
The reversed reverb trick is one of the most common ways to introduce a new element in your song. This works especially well if there’s a bit of silence before your new element hits.
Let’s look at a practical example:
Right now, the synth loop comes a bit out of nowhere. Let’s use the reversed reverb trick to introduce it more smoothly.
First, select just the first few seconds of the sound. Reverse it and add a ton of reverb. Make sure you have something with a nice and long tail:
Now, record it and re-import it into your project as a new stem. Reverse it once more so you create a swelling effect:
Line it up with the start of the synth line, add some more volume automation, and voila!
This trick works especially when introducing vocals or piano chords.
The Best Reverb Effect Plugins (Free and Paid)
Finally, let’s go over some of the most popular reverb plugins on the market.
1. Fabfilter Pro-R (Paid)
Considered by many as the Rolls-Royce of reverbs, Pro-R comes with all the usual settings you’d expect.
However, it goes well beyond your standard plugin thanks to its Decay Rate EQ and Post EQ options:
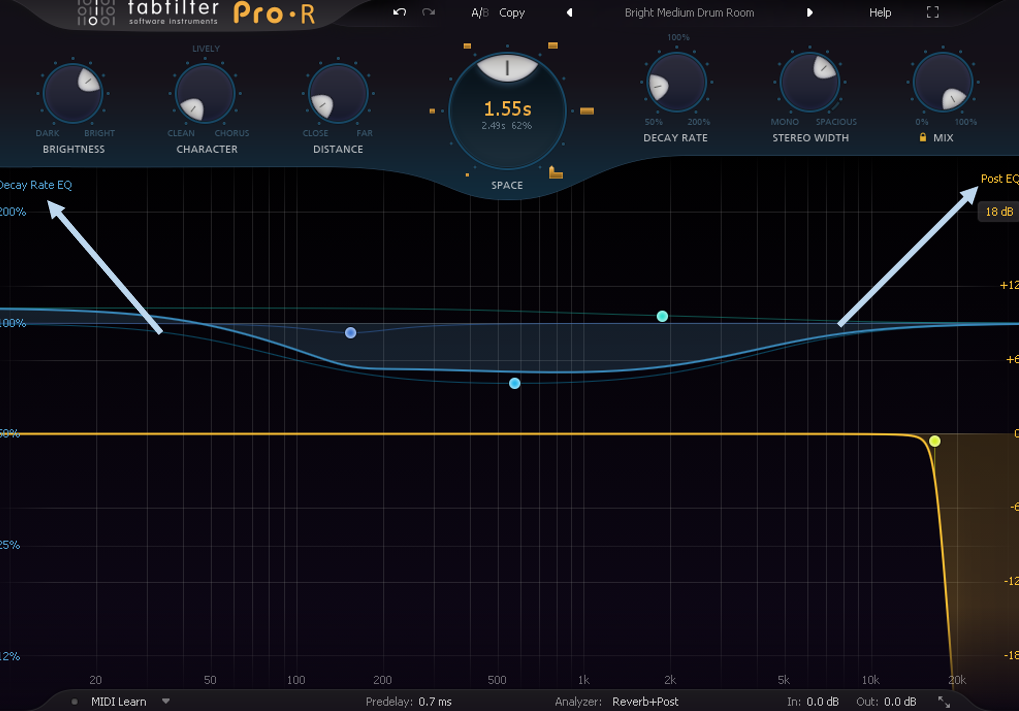
In blue, the Decay Rate EQ allows controlling the speed at which various frequencies will decay. For example, you could make the low frequencies die out much faster than the high frequencies with the following curve:
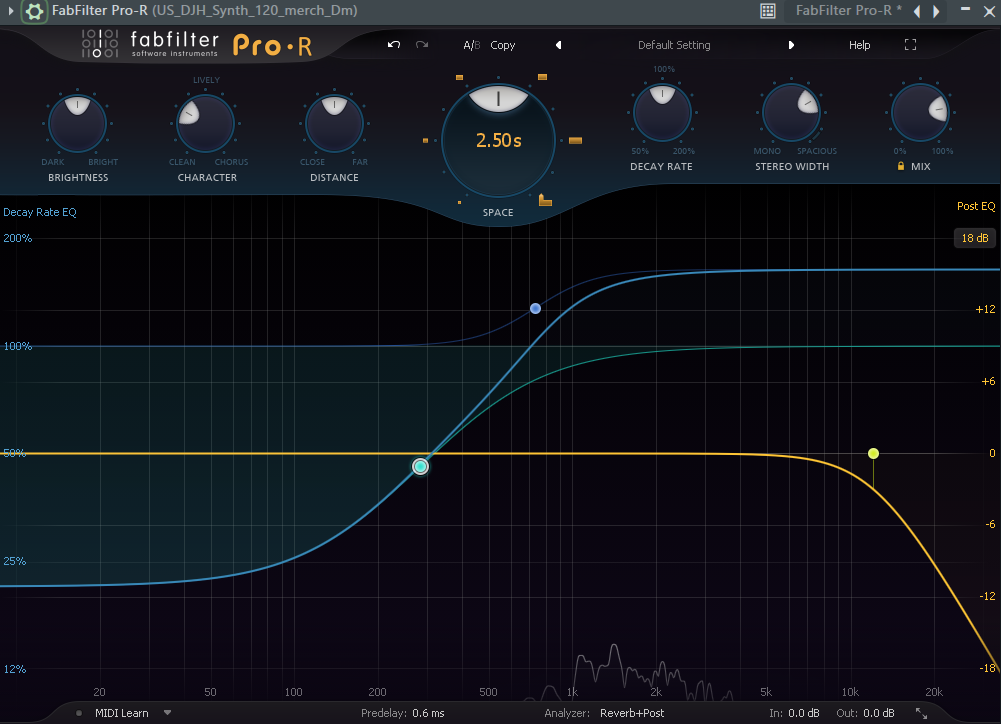
In orange is the Post-EQ curve which allows to EQ the final output sound.
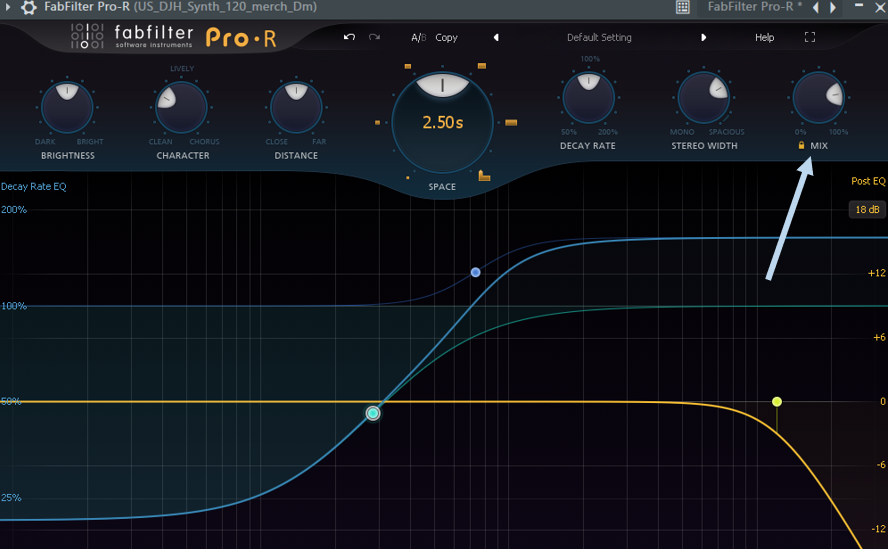
One feature that I love is the ability to lock in the mix level you want. This way, even when you switch between presets, your dry/wet balance remains the same:
As is the case with all Fabfilter plugins, you get a stunning array of presets to work with. There are a ton of other settings you can tweak, but suffice to say this one is a must-have in your arsenal.
2. Valhalla VintageVerb (Paid)
If you’ve spent any time watching production tutorials on YouTube, you will have surely seen people use Valhalla VintageVerb:
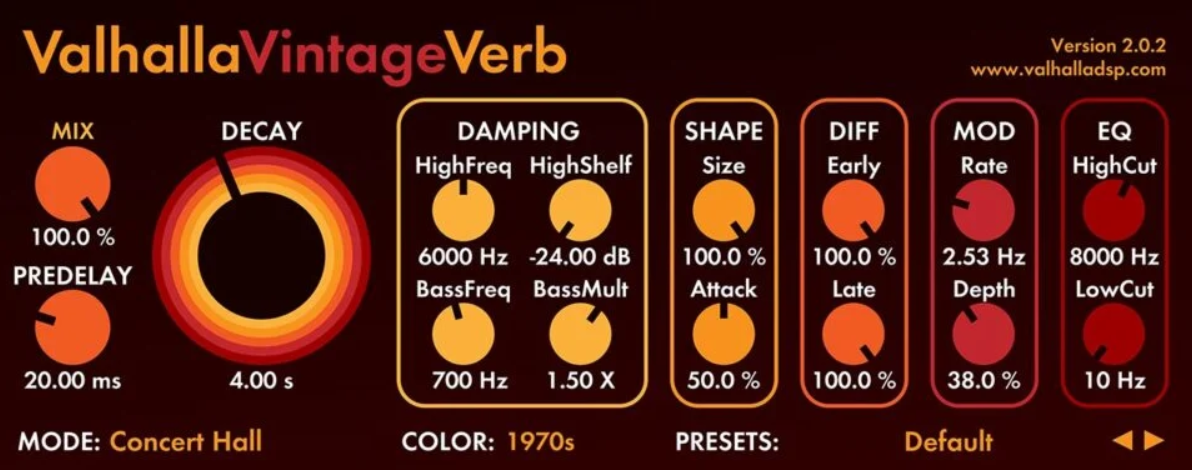
Valhalla VintageVerb boasts 19 reverb modes, from Plate to Chorus Space to Cathedral. It also has 3 different “colors”: 1970s, 1980s, and “Now” (the layout actually changes color as you switch, which is a nice touch).
One of the unique features of VintageVerb is the ability to turn the decay all the way up to 70 seconds. For reference, both Pro-R and FL Studio’s stock reverb max out at 20 seconds. This allows you to create amazing lush atmospheres.
Other cool features include:
- Shape: lets you control the size of the room, as well as the proximity to the source sound
- Diffusion: controls the density of the early and late reflections. Setting it to 0% will create an almost delay-like effect
- Modulation: lets you modulate the frequency of the reverb
If you’re looking for a reverb unit that will give you a lot of character and expression, look no further!
3. Valhalla Supermassive (Free)
From the same makers as VintageVerb, I’ve lost count of how many times I’ve recommended this plugin. In my opinion one of the best free plugins out there, Supermassive is my go-to to create otherworldly atmospheres:
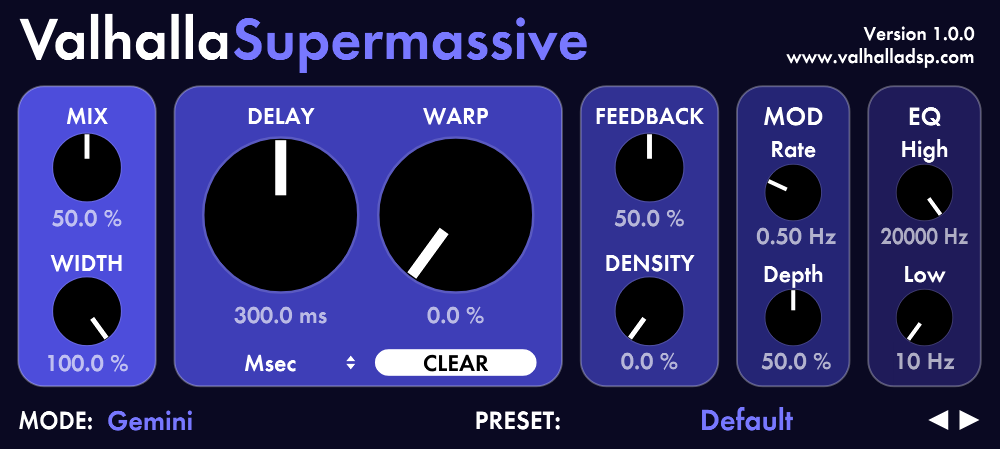
Although technically a delay plugin, pushing the delay setting and warp setting will create massive reverbs. My favorite presets are “DarkMatter” and “Barnard33”, which turn any single note into haunting textures:
One cool feature of Supermassive is that it re-interprets audio in real-time. This means you can tweak knobs as the sound plays to create cool artifacts:
I’ve actually gone over this one in my Delay 101 Guide, so make sure to check that one out!
4. Fruity Reeverb 2 (Free)
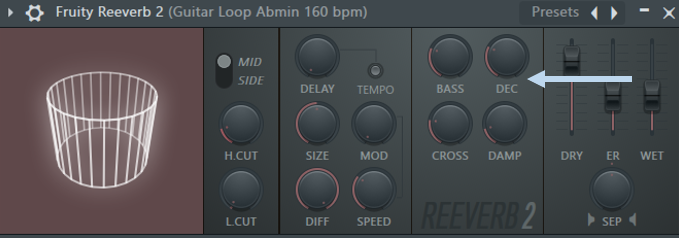
Fruity Reeverb 2 was my plugin of choice for a number of years when I started producing. So it’s only logical that it gets a mention here:
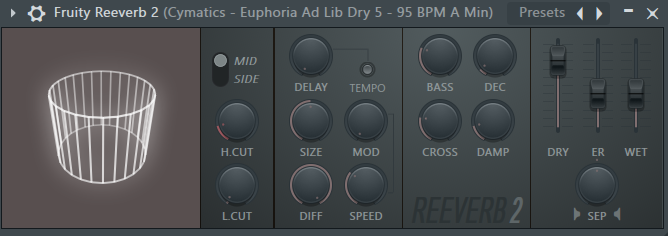
Although it does lack features compared to other options on the market, it will get the job done for most applications.
Beyond your standard settings, you get a cool “tempo” feature. This lets you sync the pre-delay with the tempo of your project. The “ER” setting stands for “Early Reflections” and enables you to control the relative level of the first reflections.
Finally, the Stereo Separation knob will create some additional width in your reverb.
With a few handy presets at hand, Reeverb 2 is a great stock plugin to start out with and get familiar.
5. Ableton Live Reverb (Free)
Last on our list is Ableton Live’s stock plugin reverb unit:
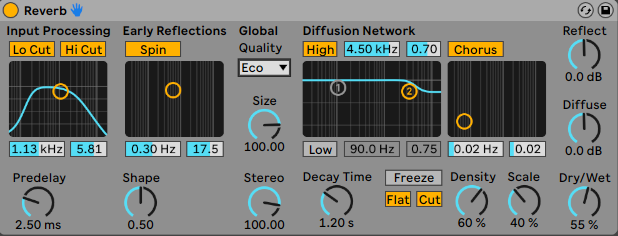
For a stock plugin, this one goes well beyond what you would expect. Let’s go over some of its controls:
- Lo Cut and Hi Cut: allow you to sculpt the input signal before any processing
- Spin: lets you modulate the early reflections
- Diffusion Network: like Pro-R Decay Rate EQ, this lets you control the decay rate of low and high frequencies in the tail of your reverb.
It’s also worth noting that similarly to VintageVerb, this reverb’s delay time goes all the way up to 60 seconds.
After some more free plugins? Check out our huge roundup here.
Last Words
That’s it for this guide on all things reverb! I hope you found it useful and were inspired to create some amazing sounds! Did I miss out on anything? Let me know at [email protected].
